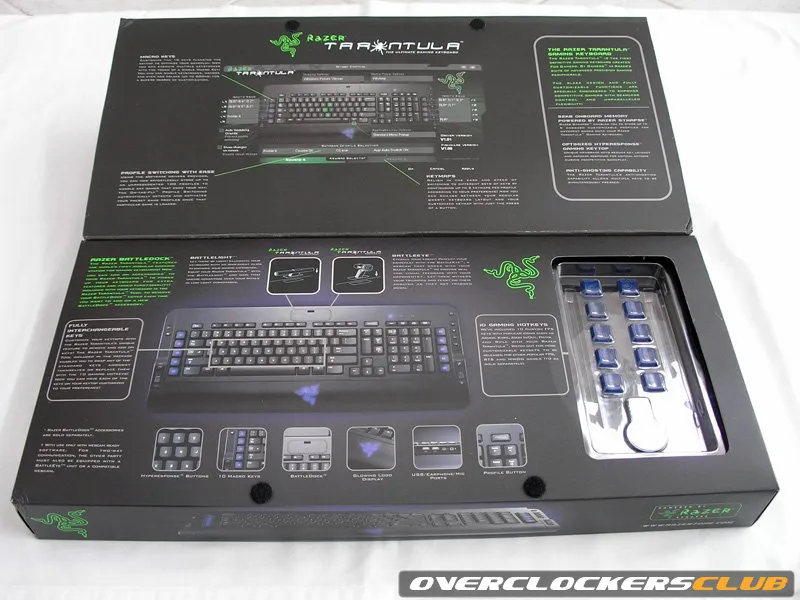
What is the Razer Tarantula Battledock?
The Razer Tarantula Battledock is a versatile docking station designed to streamline your gaming setup. It serves as a central hub, allowing you to connect multiple peripherals, manage cables, and create a cleaner, more organized gaming environment. This device is specifically designed to complement the Razer Tarantula keyboard, although it can be used with a variety of other gaming peripherals. Its primary function is to simplify the connection and disconnection of your gaming devices, making it ideal for users who frequently move their setups or want a clutter-free desk. The Battledock enhances the overall user experience by providing easy access to all your necessary connections in a single, convenient location, boosting your efficiency.
Unboxing and Preparing Your Battledock
Before you can enjoy the benefits of the Razer Tarantula Battledock, you’ll need to unbox it and ensure you have all the necessary components. This initial step is crucial for a smooth setup process. Carefully open the packaging and take inventory of everything included. Inspect each item for any signs of damage and ensure that all the parts are present. Organizing these components from the outset will help you avoid any confusion during the subsequent setup steps. Consider the placement of the battledock itself to optimize cable management.
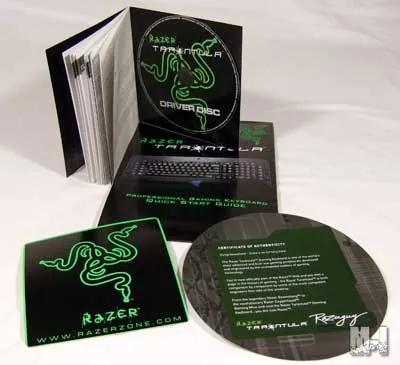
What’s in the Box

Typically, the Razer Tarantula Battledock package includes the docking station itself, a power adapter, and a set of cables for connecting to your computer and peripherals. Make sure you have the power adapter to power the dock. Cables usually include USB cables. Also, check for any included documentation, such as a quick start guide or warranty information. It is important to have a solid understanding of each of these components before moving forward. The absence of any component could impede the setup process, so be sure to check everything. Ensure everything is complete before you start connecting your devices.
Connecting the Razer Tarantula Battledock
Now, it is time to connect the Razer Tarantula Battledock to your gaming peripherals and your computer. This stage requires a bit of planning to ensure everything is connected in the correct order and that all your devices are properly recognized. Cable management at this stage is also essential to maintain a clean and organized setup. Keep the cables tidy, and make use of any built-in cable management features that the Battledock might offer. Take your time and proceed carefully, paying close attention to each connection to avoid damaging any of your devices or the Battledock itself.
Connecting Peripherals
Connecting your gaming peripherals is a fundamental part of the setup process. The Battledock is designed to accommodate various devices, including your mouse, keyboard, and monitor. You will be connecting USB devices into the rear of the dock. The specific ports and their capabilities might vary, so consult the documentation to determine the best ports for your devices. After connecting your peripherals, make sure the connections are secure to prevent any interruptions during your gameplay. Test the devices immediately to verify that everything is functioning correctly. Ensure all devices connect.
Connecting Your Mouse
Your mouse is an essential tool for gaming, and the Battledock provides convenient access for its connection. Locate the appropriate USB port on the Battledock and plug in your mouse’s USB connector. It is often recommended to use a USB 3.0 port for optimal performance. After connecting your mouse, ensure it is recognized by your computer. Test its functionality by moving the cursor around the screen and checking the responsiveness. If you face any issues, consider trying a different USB port or consulting the troubleshooting section for solutions.
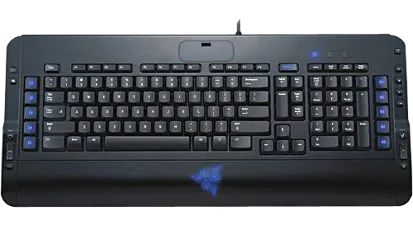
Connecting Your Keyboard
Similar to connecting your mouse, connecting your keyboard is straightforward. Find the appropriate USB port on the Battledock. Plug in your keyboard’s USB cable. Again, use a USB 3.0 port if available. After connecting your keyboard, make sure your computer recognizes it. Check that all the keys and functions are working correctly. If you are using a mechanical keyboard with customizable settings, ensure that your settings are properly loaded and that the lighting and macro functions work as expected. Ensure your keyboard is powered and ready to go.
Connecting Your Monitor(s)
Connecting your monitor is a pivotal step to enjoy gaming. The Battledock typically offers various video output options, such as HDMI or DisplayPort. Connect your monitor’s cable to the appropriate port on the Battledock and then connect the other end to your monitor. If you are using multiple monitors, connect them similarly. After connecting your monitor(s), make sure that your computer recognizes them. Check the display settings to ensure the resolution and refresh rate are set correctly. Test each monitor to ensure the visuals are clear and sharp. Proper monitor setup helps enhance the overall gaming experience.
Powering Up Your Battledock
After connecting your peripherals, the next step is powering up the Razer Tarantula Battledock. This will allow your peripherals to function correctly. Connect the power adapter to the Battledock and then plug it into a wall outlet. Be sure to use a stable power source to prevent any interruptions. Once the Battledock is connected to the power, you should see an indicator light to confirm that it is powered on. If the indicator light is not illuminated, check all of your power connections. This initial step confirms the batteldeck is ready to go.
Installing Drivers and Software
Installing the appropriate drivers and software is critical for maximizing the functionality of your Razer Tarantula Battledock. The Battledock may require specific drivers to be installed on your computer to ensure all connected devices work correctly. Download the necessary drivers from the Razer website or the provided installation disc. Follow the on-screen instructions to install the drivers. Regularly update the drivers to improve performance. Software, like Razer Synapse, allows you to customize the Battledock’s settings, manage lighting, and configure the various connected devices. Having the updated drivers is a critical step.
Setting Up Razer Synapse
Razer Synapse is a comprehensive software suite that allows you to manage all your Razer devices, including the Battledock. Download and install Razer Synapse if you have not already. Once installed, launch the software, and it should automatically detect your Battledock and any connected peripherals. Within Razer Synapse, you can customize your settings, create profiles, adjust lighting effects, and more. Explore the different features offered by Synapse to optimize your gaming setup and get the best experience possible from your Razer devices. Personalize the settings to fit your needs.
Customizing Your Battledock

The Razer Tarantula Battledock offers several customization options to enhance your gaming experience and personalize your setup. These options range from managing RGB lighting to configuring the USB ports and audio settings. Take the time to explore all available options to tailor your Battledock to your specific needs and preferences. Customization can not only improve the aesthetics of your setup but also contribute to your overall gaming efficiency. Experiment with different configurations and settings to find the setup that best supports your gaming style and needs.
Managing RGB Lighting
RGB lighting is a popular feature among gaming enthusiasts. The Battledock often includes customizable RGB lighting that you can control via Razer Synapse. You can customize the colors and lighting effects to match your style and existing setup. Explore different lighting modes such as static colors, breathing effects, or reactive lighting. Using Razer Synapse, you can sync the lighting across all your Razer devices to create a cohesive and immersive gaming environment. This is a great way to personalize your gaming setup.
Configuring USB Ports and Audio
Besides lighting, the Razer Tarantula Battledock offers other customization options. The USB ports on the Battledock can be configured within Razer Synapse. This may allow you to adjust power delivery or specify different data transfer modes. You can also configure audio settings to manage the sound output from your connected devices, such as your headphones or speakers. Experiment with the various settings to optimize your audio experience and ensure that your peripherals function at their best. These settings can greatly enhance your game.
Troubleshooting Common Issues

Even with careful setup, you may encounter some issues. Understanding common problems and their solutions will help you resolve any problems quickly. Refer to the troubleshooting guide or consult the Razer support website for detailed assistance. Make sure to update the drivers. Before contacting support, try basic troubleshooting steps, such as restarting your computer or checking cable connections. Resolving issues can seem frustrating.
Battledock Not Connecting
If your Razer Tarantula Battledock is not connecting to your computer, there are several steps you can take to identify and resolve the issue. The first step is to check the power connection and ensure the Battledock is receiving power. Verify that the USB cable connecting the Battledock to your computer is securely plugged in at both ends. Try connecting the Battledock to a different USB port on your computer. Make sure the drivers are installed properly. If the problem persists, you may have a hardware problem.
Peripheral Not Recognized
If your peripherals are not recognized by the Battledock, there are a few troubleshooting steps you can follow. Check the USB connections of your peripherals. Ensure that the peripherals are compatible with the Battledock. Check that you have installed the latest drivers. If the problem persists, try connecting the peripherals directly to your computer to determine if the problem lies with the Battledock or the peripherals themselves. Consult the troubleshooting section if the issue is still there.
Final Thoughts

Setting up the Razer Tarantula Battledock is a straightforward process that can significantly enhance your gaming setup. With careful unboxing, proper connections, driver installation, and customization, you can create an organized and efficient gaming environment. Use this guide to get started. Remember to consult the provided resources for additional assistance. By following these steps, you can enjoy the benefits of a streamlined and customized gaming experience with your Razer Tarantula Battledock.