Understanding Tevo Tarantula Auto Leveling
The Tevo Tarantula is a popular 3D printer known for its affordability and versatility. However, one area where it can be improved is bed leveling. Manual bed leveling can be time-consuming and prone to errors, leading to failed prints and frustration. Auto-leveling upgrades address this issue by automating the bed leveling process, ensuring the print bed is the correct distance from the nozzle before each print. This upgrade significantly improves print quality, reduces wasted filament, and saves time. This guide will explore the top 5 tips for successfully upgrading your Tevo Tarantula with auto-leveling, ensuring a smoother and more reliable 3D printing experience. Auto leveling is a game-changer for any 3D printing enthusiast, especially those using a Tevo Tarantula.
Benefits of Auto Leveling for Your Tevo Tarantula
Upgrading your Tevo Tarantula with auto-leveling offers several key advantages. First and foremost, it dramatically improves print bed adhesion. A properly leveled bed is crucial for the first layer to stick correctly, which is the foundation for a successful print. Auto-leveling eliminates the need for constant manual adjustments, saving you valuable time and effort. It also reduces the risk of errors caused by an uneven bed. With auto-leveling, your printer can compensate for slight imperfections in the bed surface, ensuring consistent print quality across the entire build plate. Furthermore, auto-leveling can improve the overall user experience, especially for beginners, making 3D printing more accessible and enjoyable. The upgrade provides peace of mind, knowing that the printer is automatically adjusting for any inconsistencies, thereby producing high-quality results.
Tip 1 Choose the Right Auto-Leveling Sensor

Selecting the correct auto-leveling sensor is the first crucial step. There are several types of sensors available, each with its pros and cons. The most common types are inductive, capacitive, and BLTouch sensors. Inductive sensors are ideal for metal beds, detecting the presence of metal. Capacitive sensors work well with various materials, including glass and some plastics, by sensing the change in capacitance. BLTouch sensors are more advanced and use a physical probe to measure the bed’s surface. Consider your printer’s bed type and material when choosing a sensor. Research the sensor’s accuracy, reliability, and ease of installation. Read reviews from other Tevo Tarantula users to get insights into which sensors work best. Select a sensor that is compatible with your printer’s firmware and offers the features you need for a seamless upgrade.
Types of Auto-Leveling Sensors Explained
Understanding the different types of auto-leveling sensors will help you make an informed decision. Inductive sensors work by generating an electromagnetic field and detecting changes when they get close to a conductive material, typically the metal bed. Capacitive sensors detect changes in capacitance, making them versatile for various bed materials, including glass and some plastics. BLTouch sensors are a more advanced type of sensor that uses a physical probe to touch the print bed and measure its distance. This is often considered one of the most accurate. Each type of sensor has its own advantages and disadvantages. Inductive sensors are reliable but only work with metal beds. Capacitive sensors offer more flexibility but can be affected by environmental factors. BLTouch sensors are accurate but require more complex setup. Choose the sensor that best fits your needs and budget.
Factors to Consider When Choosing a Sensor
Several factors should be considered when choosing an auto-leveling sensor for your Tevo Tarantula. First, consider your print bed material. If you have a metal bed, an inductive sensor will be a suitable choice. If your bed is made of glass or another non-conductive material, a capacitive or BLTouch sensor will be required. Check for sensor compatibility with your printer’s control board and firmware. Make sure the sensor is compatible with your existing setup. Consider the sensor’s accuracy and reliability. Read reviews and check user experiences to get an idea of its performance. Factor in the ease of installation and setup. A sensor that is easier to install and configure will save you time and effort. Finally, consider your budget, as the price of auto-leveling sensors can vary. Balance these factors to choose the best sensor for your Tevo Tarantula.
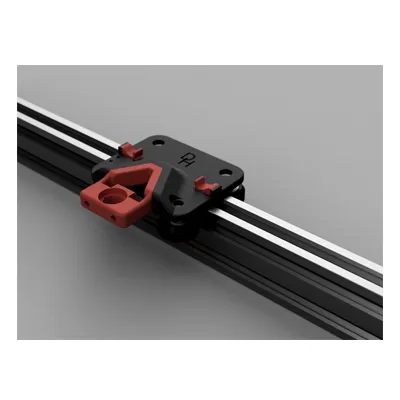
Tip 2 Proper Installation is Key

Proper installation is essential for successful auto-leveling. Start by carefully following the sensor’s installation instructions. Usually, this involves mounting the sensor to the print head and wiring it to the control board. Double-check all connections to ensure they are secure. Ensure that the sensor is positioned correctly relative to the nozzle, so it can accurately measure the bed’s distance. Test the sensor after installation to verify it is functioning correctly. A poorly installed sensor can lead to inaccurate leveling and printing issues. Take your time, be patient, and refer to online resources and tutorials. Properly installing the auto-leveling sensor can drastically improve the quality of your prints, as it makes the printer more reliable and easier to use.
Wiring and Connection Guide
Wiring the auto-leveling sensor to the control board requires careful attention to detail. The sensor typically has three or four wires that need to be connected to the appropriate pins on the control board. Consult the sensor’s documentation and the control board’s pinout diagram. Usually, you will need to connect the power, ground, and signal wires. Some sensors may also require a servo wire. Ensure the wires are securely connected and that there are no loose connections. Make sure the wiring is neat and organized to avoid any interference with the printer’s moving parts. Double-check your wiring connections before powering up the printer. Incorrect wiring can damage the sensor or the control board. Take your time and carefully follow the instructions provided. This ensures that the sensor will function correctly and provide accurate readings. Always disconnect the power supply before making any wiring changes.
Firmware Configuration for Auto Leveling
Configuring the firmware is a necessary step to enable auto-leveling. You will need to modify the printer’s firmware to tell it how to use the new sensor. Most 3D printers use Marlin firmware, and this needs to be updated to use your new sensor. Download the latest version of the firmware for your printer and sensor. Modify the configuration files to enable auto-leveling and configure the sensor type. Define the sensor’s offset, which is the distance between the sensor and the nozzle. This is a crucial step. Upload the modified firmware to your printer’s control board using a software like Arduino IDE. Make sure to back up your original firmware before making any changes. Properly configured firmware ensures the printer understands the auto-leveling sensor and can use its readings to adjust the bed. This step is critical to achieving accurate and consistent prints.
Tip 3 Calibration for Perfect First Layers

Calibration is crucial after installing and configuring the auto-leveling system. It ensures that the first layer adheres correctly to the print bed. Start by performing a bed-leveling procedure to ensure the bed is within the sensor’s range. Then, adjust the Z-offset, which is the distance between the nozzle and the bed when the sensor triggers. The Z-offset is the most important parameter, as it affects the first layer’s height. Use the printer’s control panel to fine-tune the Z-offset until the first layer is properly squished onto the bed. Print a test square or a first-layer test pattern to verify that the calibration is correct. Fine-tune the Z-offset based on your observations. A properly calibrated auto-leveling system will result in perfect first layers. Take your time and experiment to find the optimal settings for your specific setup.
Bed Leveling Procedures
After installing your auto-leveling sensor, you must understand the bed-leveling procedures. Most auto-leveling systems perform a bed-leveling routine before each print, during which the sensor measures the bed’s surface at multiple points. The printer’s firmware then uses these measurements to create a mesh that represents the bed’s surface. During printing, the printer automatically adjusts the nozzle height based on the mesh data. Make sure your bed is clean. Select the appropriate bed-leveling option in your printer’s menu, and follow the instructions. Ensure that the bed-leveling procedure is complete before starting your print. Some printers allow you to save the bed-leveling mesh. Use the mesh to get a better print result. Repeat the bed-leveling procedure periodically. This ensures your prints are consistently good.
Z-Offset Adjustment
The Z-offset is a critical setting that determines the distance between the nozzle and the print bed when the sensor is triggered. This value needs to be calibrated precisely for optimal first-layer adhesion. You can adjust the Z-offset through your printer’s control panel or through your slicer software. Usually, you will print a test square or a first-layer test pattern and adjust the Z-offset while the printer is running. Start with a small Z-offset value and gradually increase or decrease it until the first layer is properly squished onto the bed. If the Z-offset is too high, the first layer will not stick. If the Z-offset is too low, the nozzle will scrape the bed. Repeat this process until the first layer looks perfect. Write down your Z-offset value for future use. Proper Z-offset calibration will greatly improve your print quality.
Tip 4 Optimize Your Slicer Settings

Your slicer settings play a vital role in maximizing the benefits of auto-leveling. After installing the auto-leveling sensor and calibrating the Z-offset, you will need to configure your slicer software to work with your settings. Start by selecting the correct printer profile for your Tevo Tarantula. Enable auto-leveling in your slicer settings and configure the bed-leveling mesh. The slicer will use this mesh to adjust the nozzle height during printing, compensating for any bed irregularities. Optimize your first-layer settings, such as the layer height and print speed. The first layer should be printed slowly to ensure good adhesion. Also, adjust the flow rate to get perfect results. Experiment with different settings to find what works best for your printer and filament. Proper slicer settings are essential for making the most of your auto-leveling upgrade. By adjusting these, you can achieve consistent and high-quality prints.
Slicer Profiles and Settings
Slicer profiles contain essential settings for your 3D printer. Create or select a profile that is suitable for your Tevo Tarantula and auto-leveling system. The profile should include the printer’s dimensions, nozzle size, and other relevant information. Configure settings such as print speed, layer height, and infill density. Ensure that the auto-leveling feature is enabled in the profile. You can also modify the start and end G-code to include commands for bed leveling and Z-offset calibration. Save your profile and use it for future prints. Experiment with different profiles to achieve the best print quality for various materials and models. The right slicer profile and settings will help you get the most out of your Tevo Tarantula and its auto-leveling capabilities.
First Layer Settings
The first layer is the foundation of a successful 3D print, so getting it right is crucial. In your slicer, adjust the settings for the first layer to ensure good adhesion and quality. Lower the first-layer height slightly to improve adhesion. Reduce the first-layer print speed to allow more time for the filament to adhere to the bed. Increase the first-layer line width for better contact with the bed. Set the first-layer flow rate slightly higher to help the filament stick. Monitor the first layer while printing, and make adjustments to the Z-offset. Fine-tune the settings based on the filament and bed material. Experiment with different settings to get the perfect first layer, as it will make your prints more reliable. The first layer is the key to print success.
Tip 5 Troubleshooting Common Issues

Even with a well-installed and calibrated auto-leveling system, you might encounter some issues. Knowing how to troubleshoot these problems can save you time and frustration. If the sensor isn’t triggering, check the wiring, sensor distance, and firmware configuration. Ensure the sensor is within the correct range for the bed. If you are experiencing bed adhesion problems, check the Z-offset and bed temperature. Clean the bed surface and ensure the filament is suitable for the material. Review your slicer settings. If you encounter other issues, consult online resources, forums, and troubleshooting guides. Don’t be afraid to experiment and make adjustments. Troubleshooting is a part of the learning process. Be patient, and you will be able to resolve most issues and enjoy the benefits of your auto-leveling upgrade.
Sensor Not Triggering
If your auto-leveling sensor is not triggering, there are several potential causes to investigate. Firstly, check the wiring connections between the sensor and the control board. Make sure they are secure and correctly connected. Ensure that the sensor is within its operating range. For example, inductive sensors need to be close enough to the metal bed to detect it. Verify the sensor type in your firmware and that the firmware is correctly configured. If your sensor is a BLTouch, check the probe deployment and retraction. You may need to adjust the sensor’s position or the Z-offset in your firmware. If you still encounter issues, test the sensor’s functionality with a multimeter or a simple test in the firmware. Correcting the issue will make your printer reliable.
Bed Adhesion Problems
Bed adhesion problems are a common issue in 3D printing. If your prints are not sticking to the bed, there are several potential causes to consider. First, make sure the bed is clean. Use isopropyl alcohol or another suitable cleaner to remove any grease or debris. Check the Z-offset and ensure that the nozzle is close enough to the bed during the first layer. Adjust the Z-offset in small increments until the first layer is properly squished onto the bed. Ensure the bed temperature is appropriate for the filament. Different filaments require different bed temperatures. Use the appropriate settings. Make sure the first layer is printed slowly. Consider using an adhesive, such as glue stick, on the bed. Experiment with different settings and techniques until you achieve excellent adhesion. Print adhesion is the key to success.
Conclusion

Upgrading your Tevo Tarantula with auto-leveling is a worthwhile investment that significantly improves print quality, reduces frustration, and enhances the overall 3D printing experience. By following the top 5 tips outlined in this guide, you can successfully install, configure, and calibrate your auto-leveling system. Remember to choose the right sensor, install it properly, calibrate the Z-offset, optimize your slicer settings, and troubleshoot any issues. With patience and persistence, you will be able to achieve amazing results with your upgraded Tevo Tarantula. Enjoy the benefits of auto-leveling and start printing with confidence. Auto-leveling is a game-changer for any Tevo Tarantula owner, making 3D printing easier, more reliable, and more enjoyable.